Encounter levels, weaknesses and move notes below are compiled from released-game player
walkthroughs and were checked against patch v1.1.01 on 15 October 2026; achievement unlock
rates are from Steam (App 2001760). Exact health values, frame data and full
drop tables are not published by any source we use, so they are not listed.
Rangifer
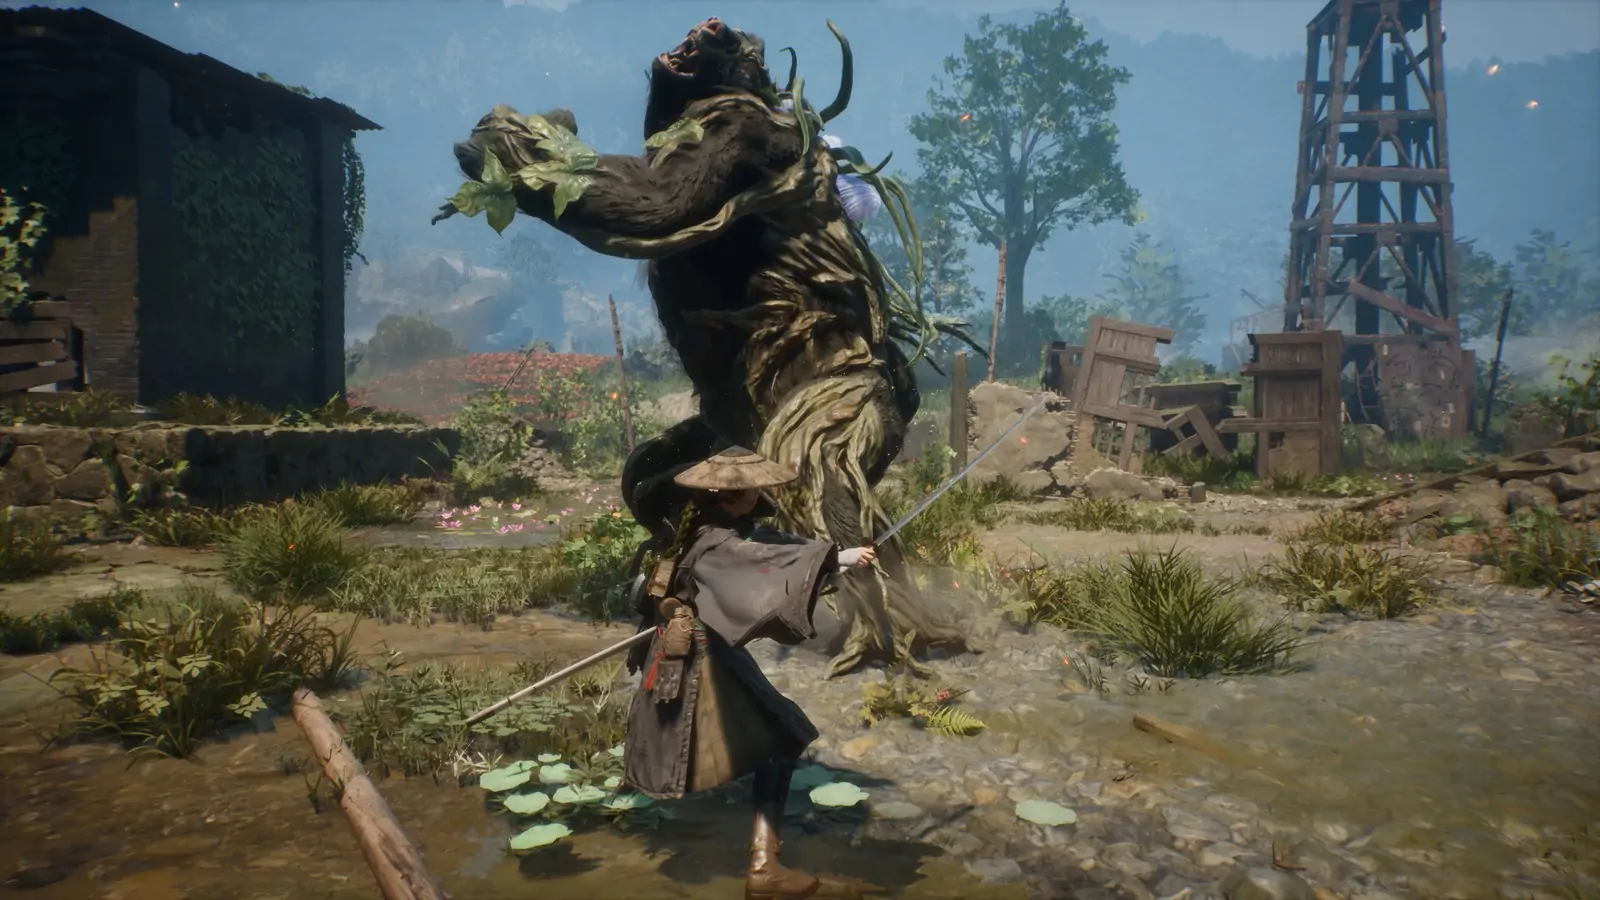
Rangifer is the first Nushi of Beast of Reincarnation and the boss that teaches the game’s parry-to-Flow loop. You fight it twice in Chapter 1 (Ogouchi Buffer Zone): a one-bar crater fight around level 9 and a two-bar rematch around level 12 in its sealed lair near Subcity 03. Steam lists Rangifer’s End at 53.5% of owners.
| Chapter / region | Chapter 1 – Ogouchi Buffer Zone |
| Fight 1 | Level 9 – the crater lake below the Cliff-Facing Tower (campsite nearby), one health bar |
| Fight 2 | Level 12 – sealed lair past the locked gate near Subcity 03, two health bars, adds a jumping attack |
| Weakness | Fire (rematch resists Burn, so use raw fire damage) |
| Recommended player level | 6–7 for the crater, 10+ for the lair |
| Achievement | Rangifer's End – 53.5% of Steam players |
How to approach Rangifer
- 1. Activate the Cliff-Facing Tower campsite first, then use Extend to reach the high ground and open with an air assassination.
- 2. Stand slightly back so you can read the antler swings. Parry the normal swing and punish the lowered head – each parry fills Flow for Koo.
- 3. When the body glows red, give space: the four-sweep combo is not a normal parry check.
- 4. Bring Higanbana: Seeds on Koo and Fire Arrows on Emma. In the rematch, keep the same parry timing for phase two and do not stand under the jump.
- 5. After the win, Koo can use Rangifer’s Nushi skill to restrain enemies – it becomes the key tool against Corvus later.
Full Rangifer fight guide →
Lacerta
Lacerta is a newt-like Nushi that slips in and out of water and fights with Poison and Slow. You meet it twice in Chapter 2 (Ancient Civilization Zone): a level-13 fight past the Reservoir: Interior campsite and a level-16 lair fight near the Nushi’s Lair Entrance campsite. It is the biggest drop-off point on Steam – Lacerta’s End sits at 43.8%, ten points below Rangifer.
| Chapter / region | Chapter 2 – Ancient Civilization Zone |
| Fight 1 | Level 13 – arena past the Reservoir: Interior campsite |
| Fight 2 | Level 16 – north-eastern lair near the Nushi’s Lair Entrance campsite, two full health bars |
| Weakness | Shock – Thunderwave Sword, Koo’s Sakura: Javelin, Bolt Shards |
| Status it inflicts | Poison and Slow |
| Rewards | Lacertine Memories (Nushi Skill: Dokuzeri Shower); Dokuzeri: Fang and Blade Art: Dokuzeri |
| Achievement | Lacerta's End – 43.8% of Steam players |
How to approach Lacerta
- 1. Equip the Thunderwave Sword (earned in the same zone from the Elite Golem guarding the Lightning Stone) and give Koo Bolt Shards plus an Antidote.
- 2. Mouth Snap: three bites – parry each one; it is your best Flow and HP source.
- 3. Tail Swipe: it turns away and swings, often twice – parry and watch for the second.
- 4. AoE explosion leaves a slowing pool and damaging plants – leave the pool and shoot from range.
- 5. Underground lunge: you cannot hit it while submerged, so dodge instead of shooting.
- 6. Swamp summons: let Koo clear the small copies while you keep the boss in view.
- 7. At about 50% in the lair fight it glows red (Blight). Combos get faster but timings stay the same; purple smoke signals a parryable charging lunge.
Thunderwave Sword →
Nue Malefact and Male Purifier
The Nue Malefact first appears in a Chapter 1 flashback after Rangifer, then becomes the target of a pursuit through Chapter 3’s Great Wall Terraces. The chase ends beyond the massive northern gate in a level-20 duo fight against the Nue and a Male Purifier.
| Chapter / region | Chapter 3 – The Great Wall Terraces (flashback in Chapter 1) |
| Pursuit encounters | Level 16 – near Mountain Plaza: Forefront (Strange Signal objective), north-east of Great Forest Clearing: Approach, and south of the northern gate by the Titan Buddha |
| Final fight | Level 20 – beyond the massive northern gate, Nue + Male Purifier |
| Weakness | Poison (both enemies) |
How to approach Nue Malefact and Male Purifier
- 1. Clear the three level-16 encounters first; the final fight is locked until you do.
- 2. Bring Hunter’s Sword (Poison build-up, from the Storyteller Golem beside Great Forest: Entrance) or Poison Arrows.
- 3. In the duo fight, focus whichever enemy is pressuring you and reposition when the second joins – do not force a single-target race.
- 4. Park Koo on the Purifier with poison skills while Emma parries the Nue’s claws.
Taurus
Taurus is the bull Nushi of Chapter 4 (Pilgrim’s Zone). You fight it mid-chapter until it flees at about half health, then again at the end of the chapter, where it adds faster attacks, a phase and Golem support. Steam lists Taurus’s End at 34.8%.
| Chapter / region | Chapter 4 – Pilgrim's Zone |
| Fight 1 | About level 26 – it flees at roughly 50% health |
| Fight 2 | About level 29 – chapter finale, extra phase and Golems |
| Weakness | Acid – Acid Arrows and Koo’s Bottle of Acid |
| Reward | Nushi Skill: Charging Botan (first fight) |
| Achievement | Taurus's End – 34.8% of Steam players |
How to approach Taurus
- 1. Do not sprint after it – use ranged Acid while it repositions and prepare for its charge.
- 2. Leg slam makes roots burst up: side-step or step back. In the second fight the roots grow a flower – dodge backward.
- 3. Triple horn swing: parry all three to build Koo’s command gauge.
- 4. Tail projectiles and the jump-away shockwave slam: watch the tails and step out of the wave’s line.
- 5. Fight 2: a single horn strike then a dash across the arena into a shockwave slam or tail volley. Use Bind to slow the charge and open a window for Koo.
- 6. Save FP for the faster second phase; Koo’s command skills are your main damage source.
Corvus
Corvus is two Nushi fights back to back in Chapter 7 (Root Rot, Giant Tree Zone). The crows never attack at the same time; each spends most of its fight in the air, so this is the fight where your ranged weapons and Koo’s Rangifer restraint matter. Steam lists Corvus’s End at 28.3%.
| Chapter / region | Chapter 7 (Root Rot) – Giant Tree Zone |
| Structure | Two Corvus fights in a row; one crow at a time |
| Weakness | Ranged attacks and the Rangifer Nushi restraint skill |
| Status | Acid bombs and lingering acid pools |
| Related reward | The box from the first Corvus unlocks the First Moon blade via the Curious Golem |
| Achievement | Corvus's End – 28.3% of Steam players |
How to approach Corvus
- 1. Keep moving between the far ledges with Emma’s hair while it hovers.
- 2. Shoot arrows or crossbow bolts while it is airborne; stop before a divebomb and dodge or parry it.
- 3. When it lands low, restrain it with Rangifer and attack in melee until it flies off.
- 4. Kill the summoned Corvid Malefacts quickly so they do not interrupt your shots.
- 5. Second crow: the platforms are unstable (falling only costs time). Its final phase uses three talons, so retime your parries, and do not linger in melee after it lands – a grounded crow releases an acid burst.
Kunai and Kirin
Kunai is a Blightborn swordswoman travelling to the Capital, and Kirin is the Malefact bonded to her. You meet the pair twice: a scripted loss in Chapter 8 (Crater Zone, level 45) that ends once her health drops by about a fifth to a third, and a real fight in Chapter 12 (Capital Zone, level 49) with two health bars.
| First meeting | Chapter 8 – Crater Zone, level 45 (scripted loss) |
| Real fight | Chapter 12 – Capital Zone, level 49 |
| Weakness | Poison (both) |
| Kunai | Melee: three-slash heavy swing, branch-assisted pounce, kick-and-slash, lightning slashes – all parryable |
| Kirin | Ranged: unparryable one-hit missiles, pounce, thunder skid marks, water beam |
| Rewards | Kirin Memories, Blade Art: Thunder, Bloom Art Numasugi: Skewer; Camellia blade in the Cleanse Walker afterwards |
How to approach Kunai and Kirin
- 1. Equip a Poison blade (Hunter’s Sword or Black Blossom) and Poison arrows or bolts; give Koo poison skills.
- 2. Parry Kunai, dodge Kirin – never mix the two answers.
- 3. Keep both in view and react to whichever commits first; Kirin’s missiles can kill in one hit.
- 4. Do not step on the skid marks – they trigger thunder strikes.
- 5. Use Kirin’s lulls to heal or reposition, and keep Poison ticking on whichever one is active.
Who Kunai is →Camellia blade →
Ursa
Ursa is the bear Nushi that caps Chapter 10. Its lair sits in a forest, guarded by three Grizzly Malefacts. Empty its first bar and it sheds its shell to become a flower with vine tentacles and a fresh health bar. Steam lists Ursa’s End at 25.0%.
| Chapter | Chapter 10 – forest lair |
| Level | 46 |
| Weakness | Corrosives, Restrain and Acid (Acid Arrows, Koo’s Bottle of Acid) |
| Stealth kill | Not possible |
| Phases | Shelled bear, then a flower form with a full new bar |
| Achievement | Ursa's End – 25.0% of Steam players |
How to approach Ursa
- 1. Clear the three Grizzly Malefacts before the fight.
- 2. Leaping lunge spawns rock pillars – dodge sideways as it leaves the ground.
- 3. Rock throws – dodge, or break the boulders before they land.
- 4. Close-range stomp – roll out from under the paw.
- 5. Vine AoE that blooms blue flowers – create distance during the wind-up.
- 6. Multi-swipe combo into a slam – parry the swipes, punish the recovery.
- 7. Phase two repeats everything stronger and fills the arena with blue-flowered vines. Save Koo’s Nushi skills for restrained moments; a Lethal prompt finishes it.
Shidou and Nue
Shidou is a fast samurai and Emma’s rival; Nue is the lightning-summoning Nushi that fights beside him. Their final meeting on Mount Hiei (Chapter 11) is a duo fight with a twist: at low health Shidou siphons Nue’s health, which you can turn to your advantage. Patch v1.1.0 updated some of Shidou’s attack patterns.
| Chapter / region | Chapter 11 – Mount Hiei Zone |
| Weakness | Poison (both) |
| Shidou | Parries ranged attacks – pressure him in melee |
| Nue | Larger health pool, readable claw combo with a pause after it |
| Rewards | Black Blossom blade (Poison Storm), Bloom Art Erica: Strangle Lv1, Blade Art: Nue Lv1 |
How to approach Shidou and Nue
- 1. Shidou: parry each swing of his two-to-four-hit sword combo and both branch swings; perfect-dodge the vertical tree slam, then counter.
- 2. Nue: perfect-dodge the pounce landing, parry every strike of the five-to-six-hit claw combo and the tail spin, and keep dodging through Thunder Strikes.
- 3. Siphon trick: bring Shidou to about 30% and let him siphon Nue – each siphon lowers Nue’s bar. Repeat until Nue is near 30%, then kill Shidou.
- 4. To stop a siphon, close in and knock Shidou down with Koo’s Nushi skills.
- 5. Build Entanglement Overdrive with parries and dodges for the knockdowns; Kiku: Bloom Strike, Higanbana: Roots, Blade Art: Sakura and Iado Strike are strong here.
Who Shidou is →Black Blossom blade →
Erymanth
Erymanth is the boar Nushi of Chapter 12 in the Capital, recommended at level 47. Its red-flash charge cannot be parried, and in the second half every attack kicks up dust that hides the arena. Steam lists Erymanth’s End at 24.6%, the least-unlocked Nushi achievement.
| Chapter / region | Chapter 12 – The Capital |
| Recommended level | 47 |
| Weakness | Explosive – Explosive Bolts or Explosive Arrows |
| Phases | Normal, then a dust phase from about half health |
| Rewards | Kiku: Bloom Strike II and the Kiku Finisher |
| Achievement | Erymanth's End – 24.6% of Steam players |
How to approach Erymanth
- 1. Buy Explosive Bolts from the Wandering Merchant south of Mountain Plaza: Forefront, or pick up Explosive Arrows (Manual #6) in the Fuji Frontier Zone, and craft a stack before the fight.
- 2. Double Spin, Two-Tusk Swipe and the red-glowing 5-hit tusk combo are all parryable – the 5-hit combo is the best Flow farm.
- 3. Tusk Slam and Floral Slam: reposition during the wind-up.
- 4. Seed Bullets from its back: dodge sideways.
- 5. Charge: the tusks flash red, then it rushes. Never parry it – dodge. A missed charge leaves a two-to-three-second recovery, the biggest damage window in the fight.
- 6. In the dust phase, track it by sound and silhouette.
Beast of Reincarnation (final boss)
The final fight of Chapter 13 (To Bloom, Then Fall) in the Center of the Blight is a multi-phase test of everything the game has taught. It has no elemental weakness, so preparation is about healing stock, Flow management and parry rhythm rather than gear swaps. Beating it unlocks The End of Reincarnation and, after the epilogue, Life After the End.
| Chapter / region | Chapter 13 – Capital Zone, Center of the Blight |
| Weakness | None known |
| Phase 1 | Regenerating Nanite Shield – drain it to the 50% mark to remove it permanently |
| Phase 2 | Familiar attack patterns against the main health bar |
| Phase 3 | Enraged: more damage; Emma receives automatic power upgrades |
| Achievements | The End of Reincarnation; Life After the End; Reincarnated (clear NG+) |
How to approach Beast of Reincarnation (final boss)
- 1. Restock the strongest healing items from the hub merchants before entering Chapter 13.
- 2. Ignore the main bar until the Nanite Shield is down – damage before that is wasted.
- 3. A laser beam follows immediately after the shield breaks – dodge it.
- 4. Parry the six-plus slash string rhythmically; respect projectile volleys, energy sweeps and especially the lightning moves.
- 5. Do not commit to long recovery animations until a string has clearly ended, and keep stamina for emergency dodges in phase three.
Ending achievements →